Saturday, April 23, 2016

blog 20 Careers in Art


Blog 20
Apr 4, 2016

Part of high School education is explore different types of Careers in Art. 
  • Teaching a variety of lesson the in compose modern and up to date careers in the field of art
  • Have students do reports, research, projects, and class presentation on different career and types of arts.
  •  requiring students to Maintaining portfolios
  • Have class critics
  • Have students us proper art terminology
  • Keep up to date on art college, scholarships, entry requirements, and educational opportunity for students.
  • Have professional artist from the community visit and discuss the career path they took.
  • Have students sell or produce a/some produces and sell them. 


Markers, ink and washes

Blog 18
March 18, 2016
Markers, ink, and washes
 
Marker Wash Project:
Supplies:
  • Paper: Watercolor paper or smooth sheet of paper especially made for pen and ink.
  • Brushes: There are paintbrushes made specifically for watercolor and ink. The bristles are designed to hold that type of media.   To cover a lot of large areas, then use a bigger brush;. For finer details, try a small and rounded brush.
  • Water:  It will help give you control over your pigment and tone. Some people like to have two separate water containers. One stays completely clean and the other is allowed to get dirty as to not alter your wash.
  • Palette:  For mixing and creating clean washes. You can use anything as your palette as long as it keeps colors separated.
  • Markers: old, used, new they all work. I used Crayola, the washable type.
  • Ink: There are a lot of brands and options for types of ink. Some have an acrylic base while others are resemble a dye.
 Project:
1. Draw a still-life (or the subject of the project)
Creating a wash


2. Put marker tip in small amount of water.  Use the wash on your picture.
3.The general idea is to work light to dark, and large to small. Don’t start with the darkest shade. It will be hard to do anything with that, like add variation in tone, detail or even other colors. Instead, work in layers.

4.Start with the lightest shade you see. Wait for everything to dry before proceeding to the next layer, which is going to be slightly darker than the last. Mix the wash and apply it to the necessary areas. Again, wait for it to dry and mix again. Repeat the process until you’ve added all of the tones so you have a nice balance of contrast.
5.If you have any fine details, like the edge of an object, you can use a tiny brush or even a nib to accentuate them.
 
 
Other ink wash options:  You want to create a some interesting, experimental washes that aren’t concerned with form.  One way to do this is a “wet-on-wet” technique. Wet the area of paper that will receive the ink. Make it as big or as small as you want. Then, using your brush, drop ink onto the watered spot. It will have a mind of its own and pigment will feather in multiple directions.  Alternatively, you can pick up the paper and guide the ink around the page.
 
Elements and Principles of design:

Shape / Form: Shape implies spatial form and is usually perceived as two-dimensional. Form has depth, length, and width and resides in space. It is perceived as three-dimensional.

Color: all come from the three primaries and black and white. They have three properties – hue, value, and intensity.

Value: refers to relative lightness and darkness and is perceived in terms of varying levels of contrast.

Space / Perspective: Space refers to the area in which art is organized. Perspective is representing a volume of space or a 3-dimensional object on a flat surface.

Unity: is achieved when the components of a work of art are perceived as harmonious, giving the work a sense of completion.

Tuesday, March 29, 2016

Class field trips


Blog 17
March 23, 2016
 
Field trips
Pearl Fryar Topiary Garden:
 Pearl Fryar moved to Bishopville in 1976.  The three acres that surround his home was flat and barren. In the early 80's, he began planting and pruning trees and shrubs. After two decades of  constant labor, he transformed his yard into an internationally-known topiary garden that attracts 5,000 visitors a year. The trees and shrubs are works of art. There are hand made sculptures through out the garden.
A Man Named Pearl – Documentary & Reviews
A feature-length documentary released across South Carolina in 2007, A Man Named Pearl is now taking national film festivals by storm.
 

Pearl Fryar is man who did not know the rules, so he didn't know what he was not suppose to do.  He tried and did things that no one had tried.  He pushed the limits, tied, failed and tried again, he had no real education in gardening, just desirer and wiliness to try and work.  This is fundamental to art and education.  Students should be able to experience the outcome of this and meet the man if still possible. 

 
Combining this trip with a sculpture lesson and elements & principle of Three Dimensional design.  Several ideas come to mind. 
-A school garden
-The sprite tree (pervious blog)
-recycle/found object sculpture (contact garden to see if students can place them at the Topiary garden)
-Have students brig sketch books and sketch drawings for  future paintings
-Photograph project.
     While researching field trips I found one website that would I feel would be helpful for a teacher or parent who was completely lost on the on the subject: classtrips.com. 
    It has categories for subject matters, states, fundraiser, and lesson plans.  They even break down in school activities and out of school activities.  This seems like a great tool. 
    I myself have not used it and need to do more research on the sight.  On first glance though, it seems like a good tool for information and ideas. 


Sculpture Bought Materials


Spirit Trees
Blog 16
March 21, 2016
Sculpture Bought Materials
Spirit Tree Rope/Wirer Sculptures

History: Spirit Trees Legends are plentiful about connections between humans and trees — what will  your special tree reveal about you?
    
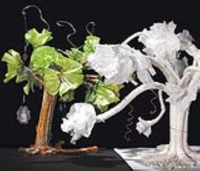
       Legends about trees have permeated cultures and theologies around the world since ancient times. The Tree of Life, the Tree of Wisdom or Knowledge, the World Tree, the Cosmic Tree — these are names for a symbolic or metaphorical tree that stories, ideas, and beliefs about life have been centered around. Nordic and Mesoamerican mythologies brought the concept that the world is supported on a strong tree that divides the realms of heaven, human existence, and the underworld. Native American legends regarding trees as caregivers and providers are abundant. The Cherokee call trees “The Standing People” and have a special fondness for cedar trees due to a legend in which the spirits of their ancestors were placed within a cedar. This "Spirit Tree" is created from lengths of coiling core, glued together and wrapped with wire to impart flexibility to the branches. It can be finished with paint and wire, and personalized with objects or images suspended from the branches or placed around its roots.
GRADES 6-8  Adjust as needed.
Materials (required):  Coiling Core-1/4" x 180 ft coil-share one across class/Coiling Core-1/2" x 100 ft coil-share two across class/ Aleene's Quick Dry Tacky Glue-4 oz -share three across class/All-Purpose Chipboard-30 ply-22" x 28"- share one sheet among 12 students/ Armature and Sculpture Wire-14 gauge- 350 ft spool-share one across class.
Optional Materials:  Economy Glass Bead Assortment-1 lb /  Copper Wire-24 gauge-100 ft spool/ Liquid Watercolor-assorted colors/ Crushed Pebbles-White/ Framed Up Jewelry Accents, assorted/anything else personal to the artist.
Preparation:
 1. Cut coiling core into 12" sections. Plan on five pieces of 1/2" and five pieces of 1/4" per tree (10 ft total). Coiling core may be cut with sturdy scissors or with a paper trimmer.
2. Cut 7" to 8" square bases from chipboard, scraps of cardboard, or matboard.

Process
1. Bend all coiling core lengths against the curve to straighten as much as possible.
2. Gather five pieces of small coiling core into a bundle. Stagger lengths. Bind with masking tape towards the bottom.Process, continued
3. Create the tree trunk. On a large  piece of coil, apply a line of glue  about 2" long below the center of the length, but not all the way to the end. See illustration (A). Position the coil with the glue side against the bundle of small coils and hold briefly until glue begins to grab. Repeat with remaining large coils, staggering their lengths as well, until they surround the bundle of small coils. Wrap with masking tape to secure while the glue dries. NOTE: The upper 9" of the coils will remain unglued and can be spread apart to begin positioning of branches.
4. Glue the short, loose ends of the paper coil bundle to the square base, pressing down and spreading them apart to form the roots of the tree. Apply masking tape to the roots to hold the tree upright on the base while the glue dries.
5. Bend and twist the long, loose ends of the paper coils to create tree branches. Loosen the ends of the coils and gently spread the paper to create leaf-like fullness on the end of each branch.
6. Insert wire sections into the trunk of the tree. The wire may be bent and curled to make more branches or vines. It may also be wrapped around individual branches to make them easier to bend, to hold them in place and to suspend objects from the branches. 
7. The Spirit Tree may be left white or painted.
Options — Glue pebbles, sand, or dried moss to the base to cover the chipboard. — Hang beads, charms, photos, or other objects from the branches with wire or string. Glue strands of cotton or wool to the branches to imitate moss.— An alternate lesson plan could focus on the Japanese art of bonsai.
 

Sculpture:Found Materials

Multiples Found Object Three-Dimensional Design Project Materials:
Five or more found objects
Glue
Scissors
tape
string
paper
cloth
wool
wire
anything to combine the objects.
 
Project description:
Students will combine multiples ( five or more) of like found objects to give them a new form. 
Students will bring together five (or more) like found objects and make one new from by combining these objects. 
Students will use techniques of binding, wrapping, coating, or other methods of joining the five+ objects to each other and to other materials in order to make the sculpture visually captivating.
 
Students can make the piece elegant, sublime, beautiful, surreal, or fantastic.
Notes: 
Texture and methods of construction are important to the over all appearance.
Objects must be structurally sound, must not fall apart.
Just about anything can be used as long as you don't pay for it.  Look around the house, junk yards, and nature.
Artist to look at:
Jackie Winsor, Lucas Samaras, Arman, Meret Oppenheim, Eva Hesse, Rauschenberg, Tom Friedman

Student Skills:
Students will explore aesthetic relationship between form and space.
Students will interpret form, space, mass, and shape.
Students will develop creative problem solving skills and artistic expression,
Students will develop conceptual and process-based problem solving skills, interpretive skills, and oral communication skills


Three Dimensional Overview Information:


Basic Vocabulary 
 
Postive Shape: a shape that has detail insides it, such as an outline of a human, with body features.

Negative shape: a shape with out any details, it just an outline.

Volume; the amount of space that a substance or object occupies, or that is enclosed within a container, especially when great.
Line: marks that span a distance between two points (or the path of a moving point). As an art element, line pertains to the use of various marks, outlines and implied lines in artwork and design. A line has a width, direction, and length. A line's width is sometimes called its "thickness". Lines are sometimes called "strokes", especially when referring to lines in digital artwork.

Contrast: the state of being strikingly different from something else, typically something in juxtaposition or close association.
Direction: a course along which someone or something moves.


Monday, March 14, 2016

Incorprating Aspects of Film Making Into Art classes

Film-Making And Art Classes

I would have to ask my students what they are interested in when it comes to film making.  I like to find out from my students what they are personally interested in.  Costume Design has come up in the past with some of my younger students.  Film as a media has a big impact on today's society and invades every aspect of our life's. I think it's important to be able to reading and understand media today.  Media literacy is more important now than it has ever been. 

 
A basic way to start teaching filmmaking would be though stop motion.  Starting with construction paper cut outs and a free app. have students create a story with a bigger meaning or theme.  Next assignment, a stop motion with a camera and toys. This would require editing, planning, scripting, music, and more.  The last assignment I would have students make an live commercial, try to sell something.  They would have to create a product or service and sell it.  Through these processes students would learn a lot about how films are made, in-depth planning process, media literacy, and technology used to produce media.

Paper Heart Stop Motion Video


My Little Pony Transformer Stop Motion

Special Needs and Gifted Students.

Special Needs and Gifted Students In Art Education

In Art, as well as academics,  I think that you may find that there are a lot of similarities to the approach to teaching both special needs students and gifted students. You will find that they also work very well together.  Gifted students will be challenged and gain a great amount of experience when paired with a special needs students.  Special needs students receive one on one help and build invaluable peer relationships.  Both gain a deeper understanding of others.  This can hold true for any students working with special needs students.

My personal options about specific lesson is keep the lessons the same for all the students, however you will need to modify aspects of the assignment on individual bases to suit the individuals needs. I take it as it comes.  What worked for one student doesn't always work for another.  Everyone can do it; it's just a matter of how we are going to get there. Techniques and tools may need to be modified for physical, emotional, or mental reason (this includes modifications  to challenge a student more).  

Please remember no matter what, all students want to be engaged and helpful!

Lesson For All Levels-Clay

Surrealism Clay sculpture
you can add-with at least two different elements combined to make one: one organic element and one manmade.

1.Show ppt. with examples


2.Show students how to put texture into clay using tools and hands.

3. Have students sketch some ideas.

4. Give each student clay to create a sculpture,

5. When dry paint with bright texture patterns.


Made by Students ages 8-18: